So I decided that this weekend would be a good time to do my endlinks and lateral links. I was hoping to finish those up on Friday and then tackle the steering rack on Saturday. Instead, I totally borked my car on Friday because I was trying to rush things and now I get the pleasure of an emergency drum-to-disc conversion.
Lemme lay it out for you, I put the car up on jack stands in the street since I have no off-street parking (mistake #1). I took both tires off (mistake #2). I replaced the endlinks, but after no amount of fighting could I get the lateral links out. So I said screw it for the day, when to put the tires back on, starting with the left, higher, tire (mistake #3). As I’m jacking up the car to put the tire on the weight shifts, the jack stands tip and the car goes pop.
Turns out the pop was my right rear drum brake smashing into the sidewalk. To make matters worse, I broke my jack and the car had shifted so that the right hub was over the sidewalk, meaning I couldn’t jack it up to get a tire on the right side.
After a few choice swear words, I got a spare tire on the left side, and had my wife drive the car forward a few feet with the knuckle digging into the sidewalk and pavement. When she hit the brakes to stop, brake fluid squirted out everywhere from the rear right, which is when I noticed that one of the pistons was stuck in the open position. I managed to get a 2nd spare on the right rear and pull it around to a parking lot behind my house owned by my landlords. Got my regular tires on and then just let it sit overnight while I stewed.
So, today was a trip to Harbor Freight for a new jack and some additional tools that I’d need for the drum-to-disc conversion. I’ve got 1 side almost completed, save for the e-brake assembly. Tomorrow will be the other side + bleeding the brakes.
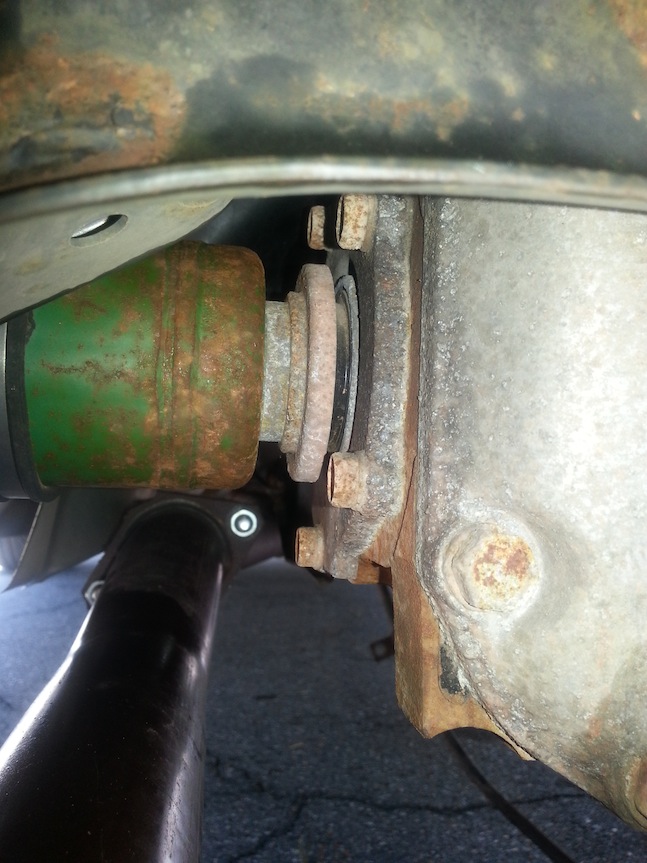
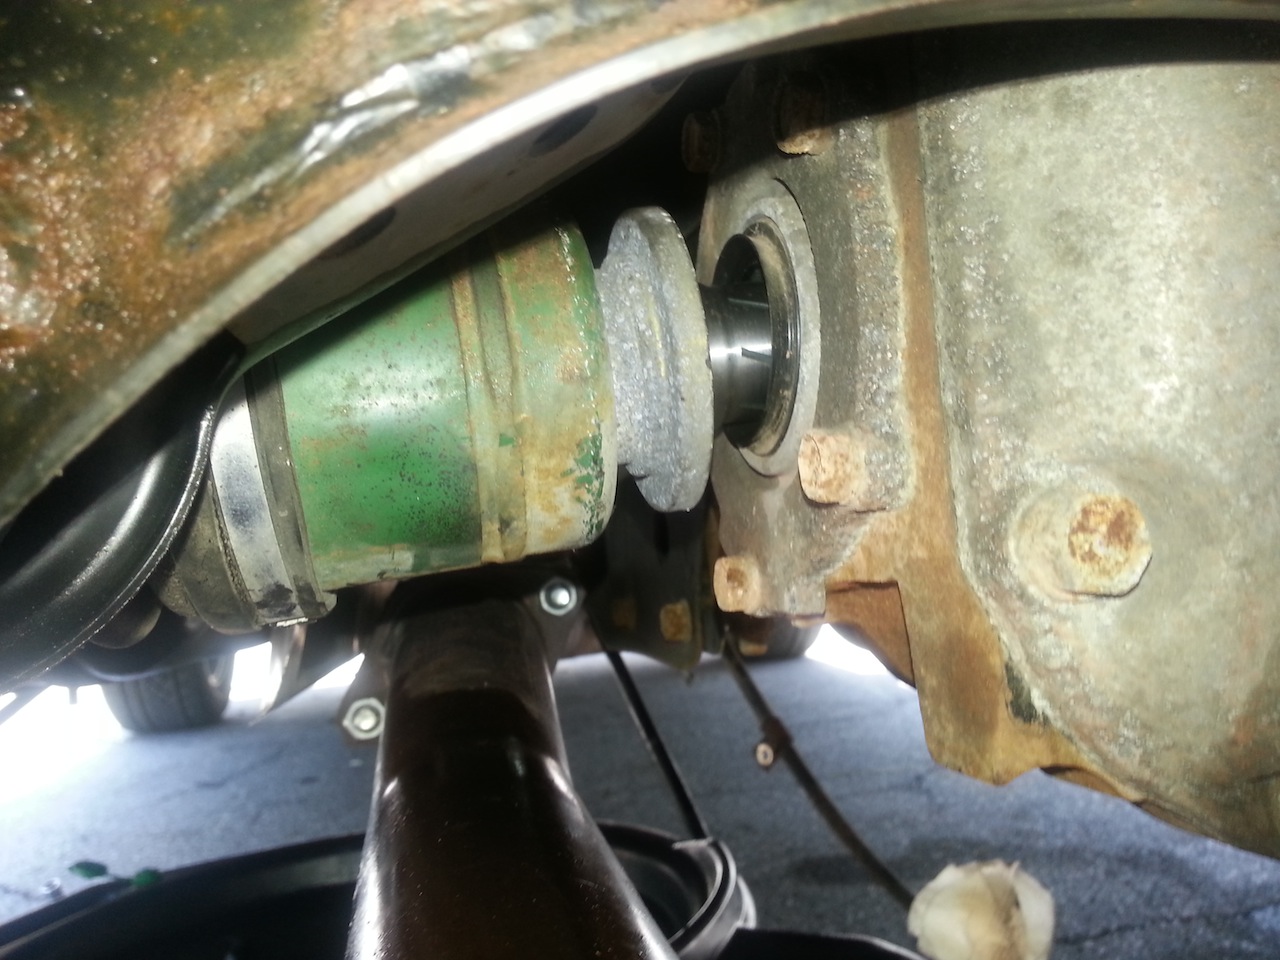
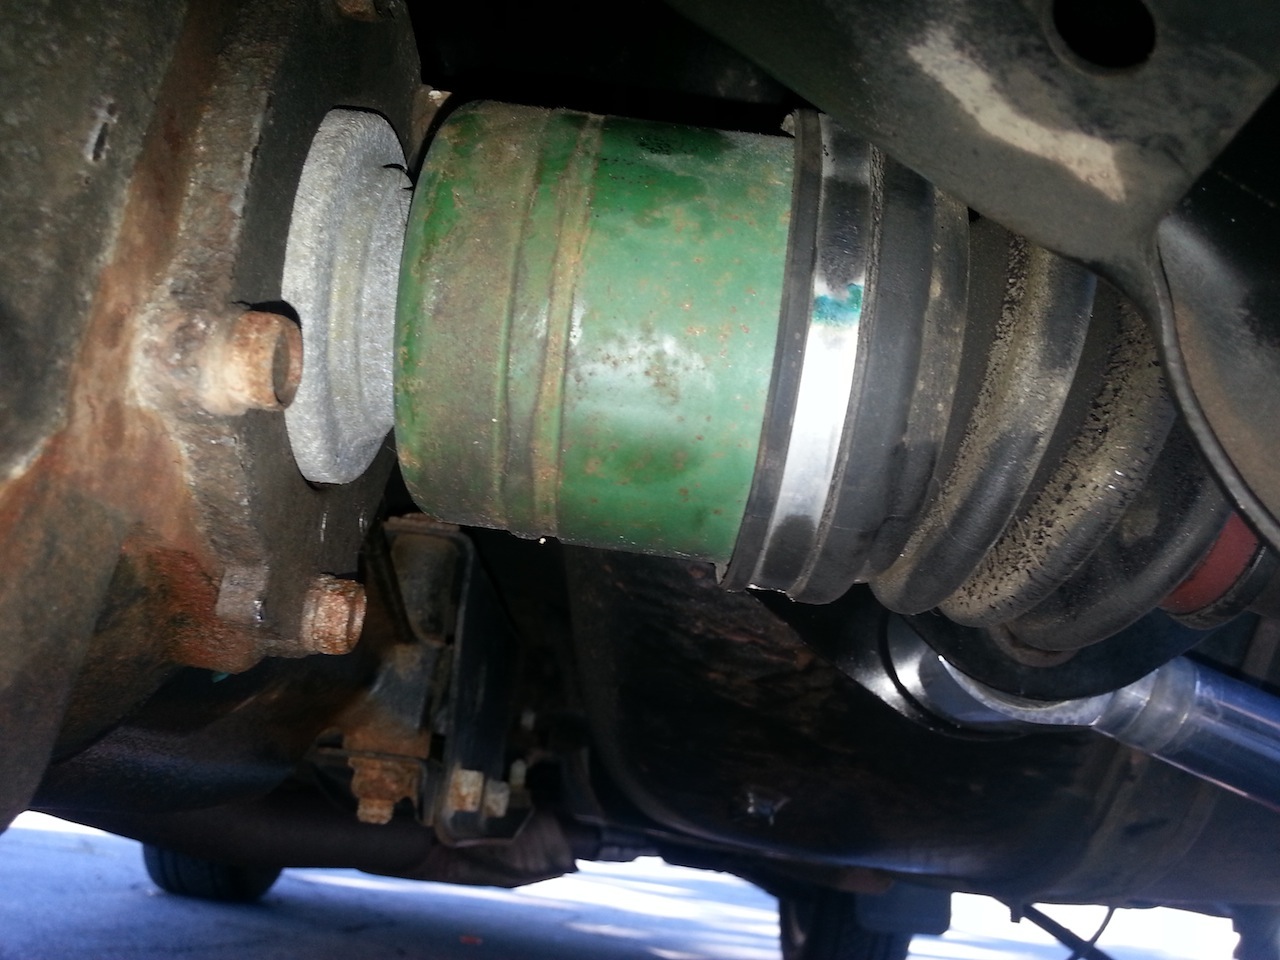
First off, here’s a shot of my busted drum brake, notice the right piston stuck in the open position:
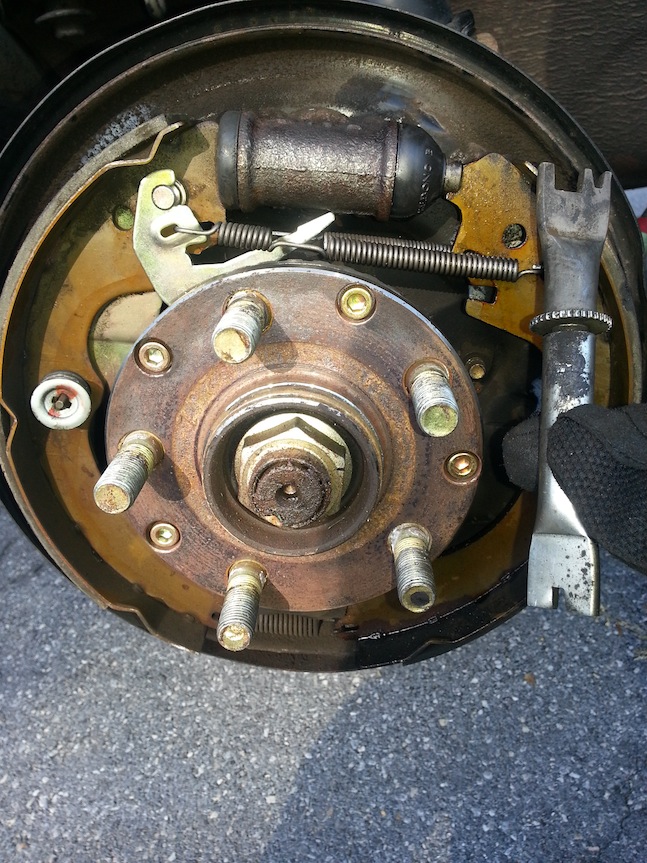
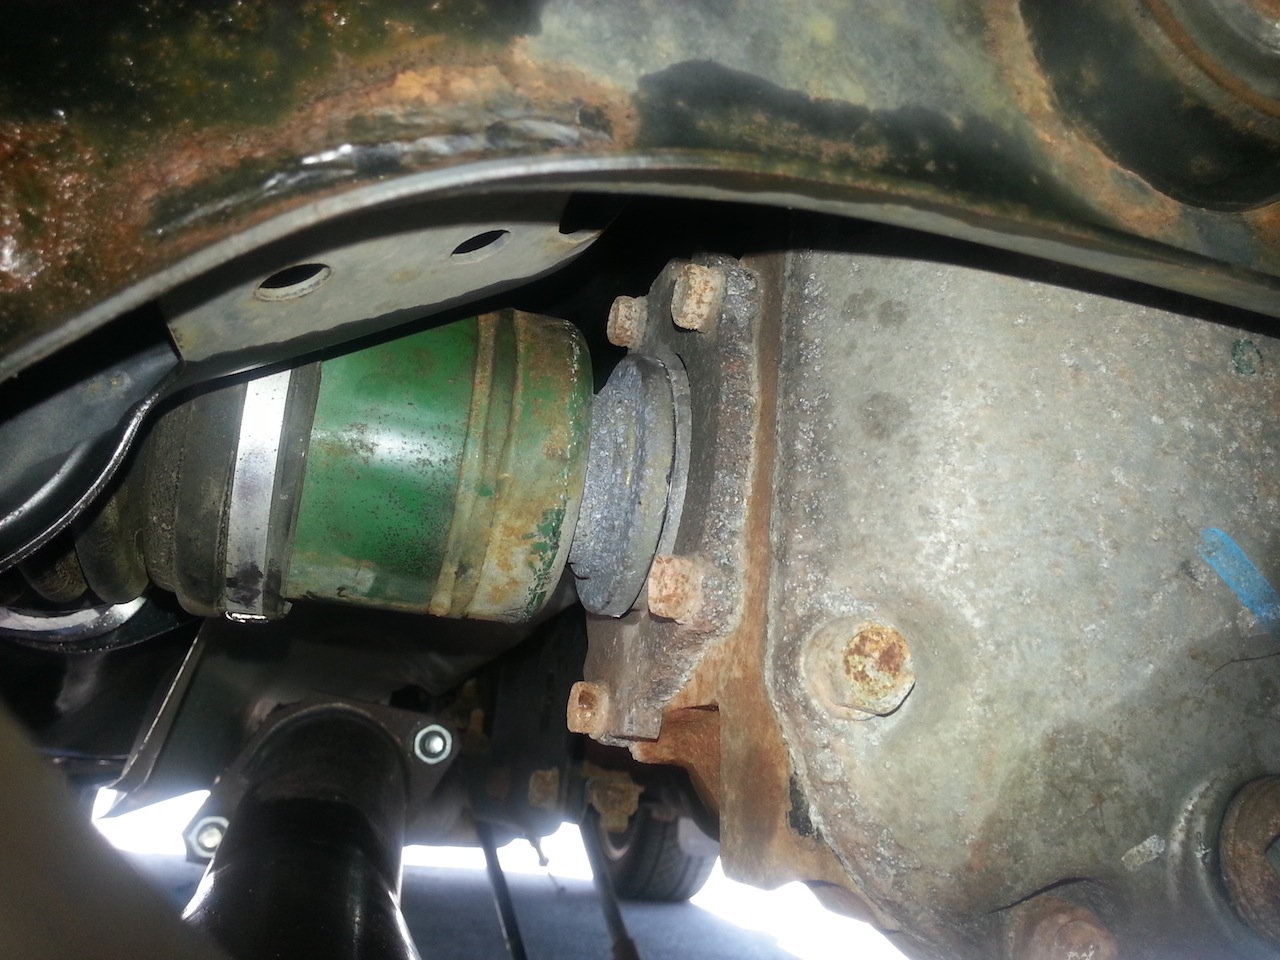
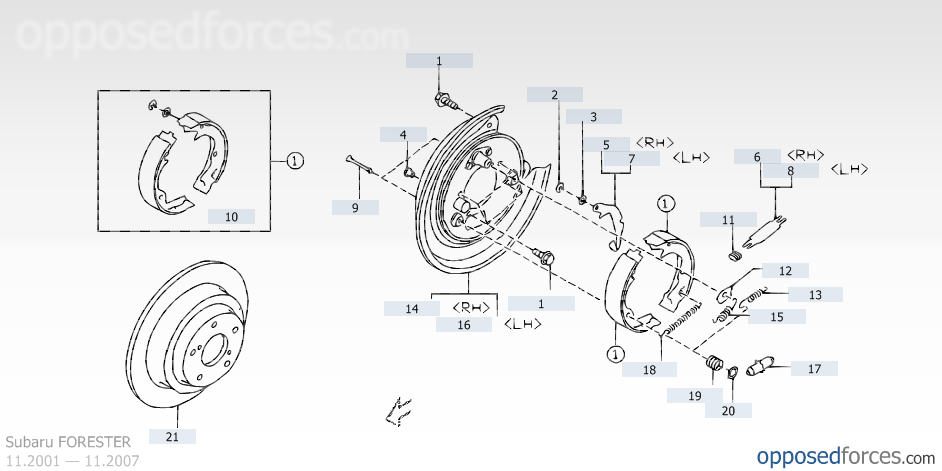
Here’s a shot of the drum brakes that I started with
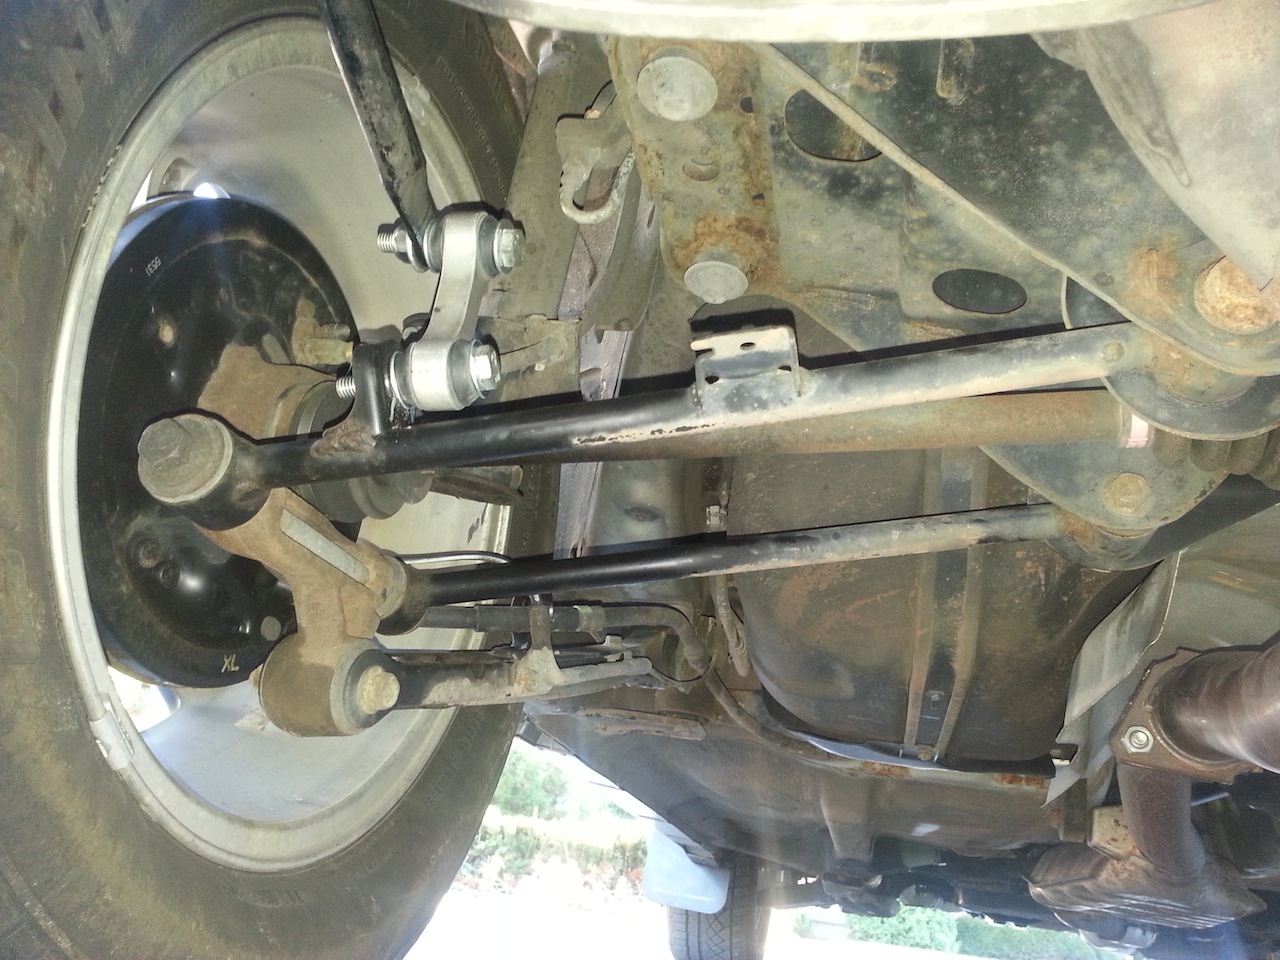
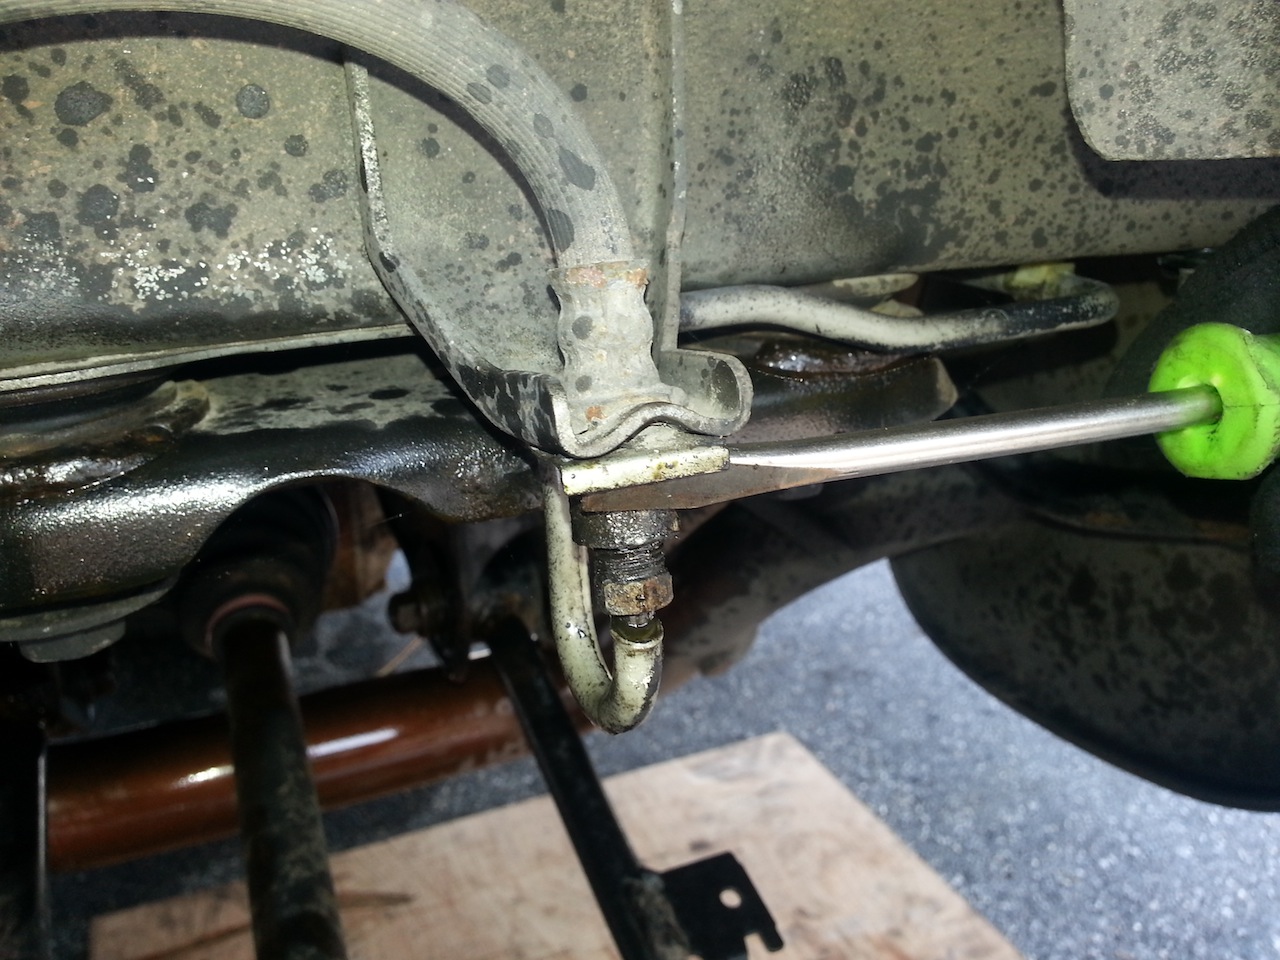
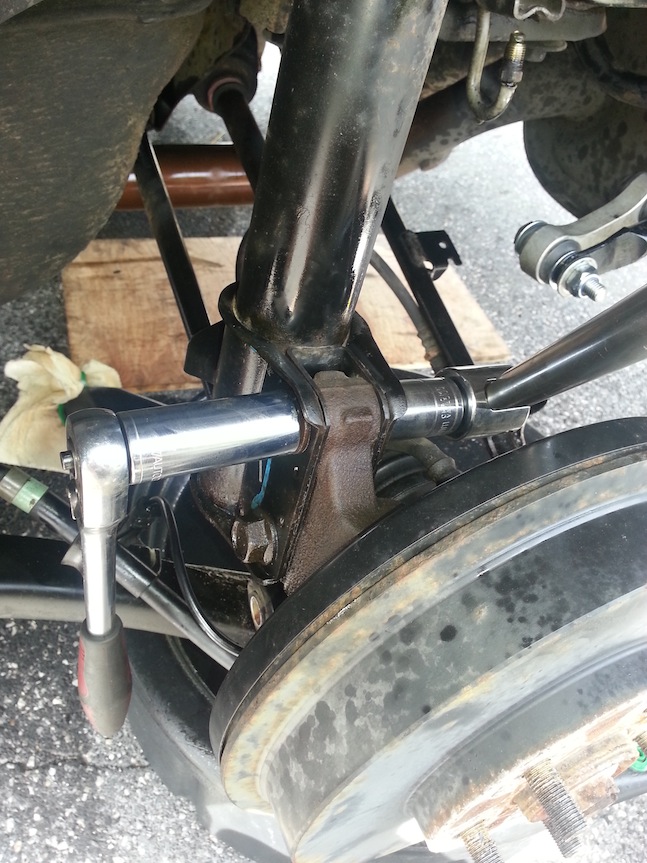
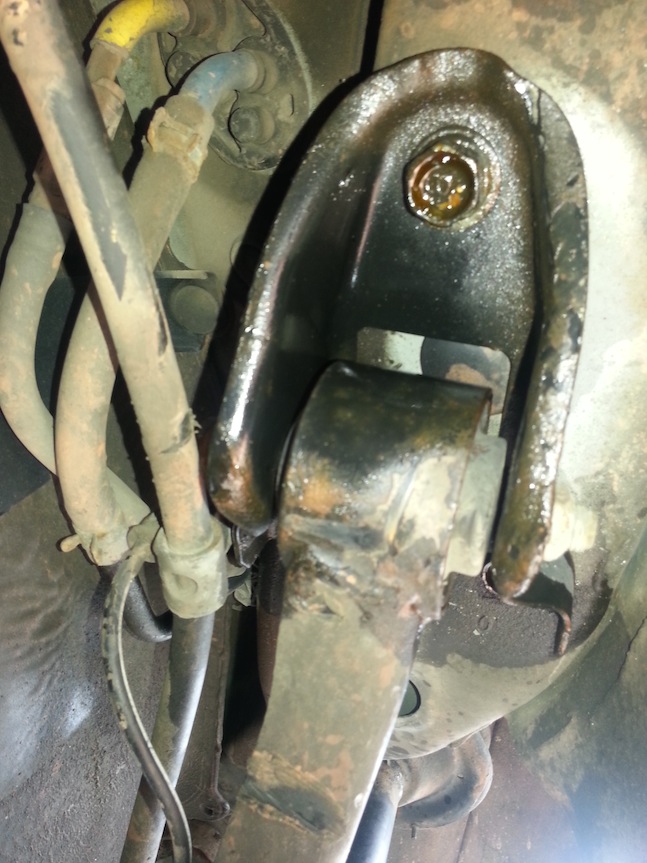
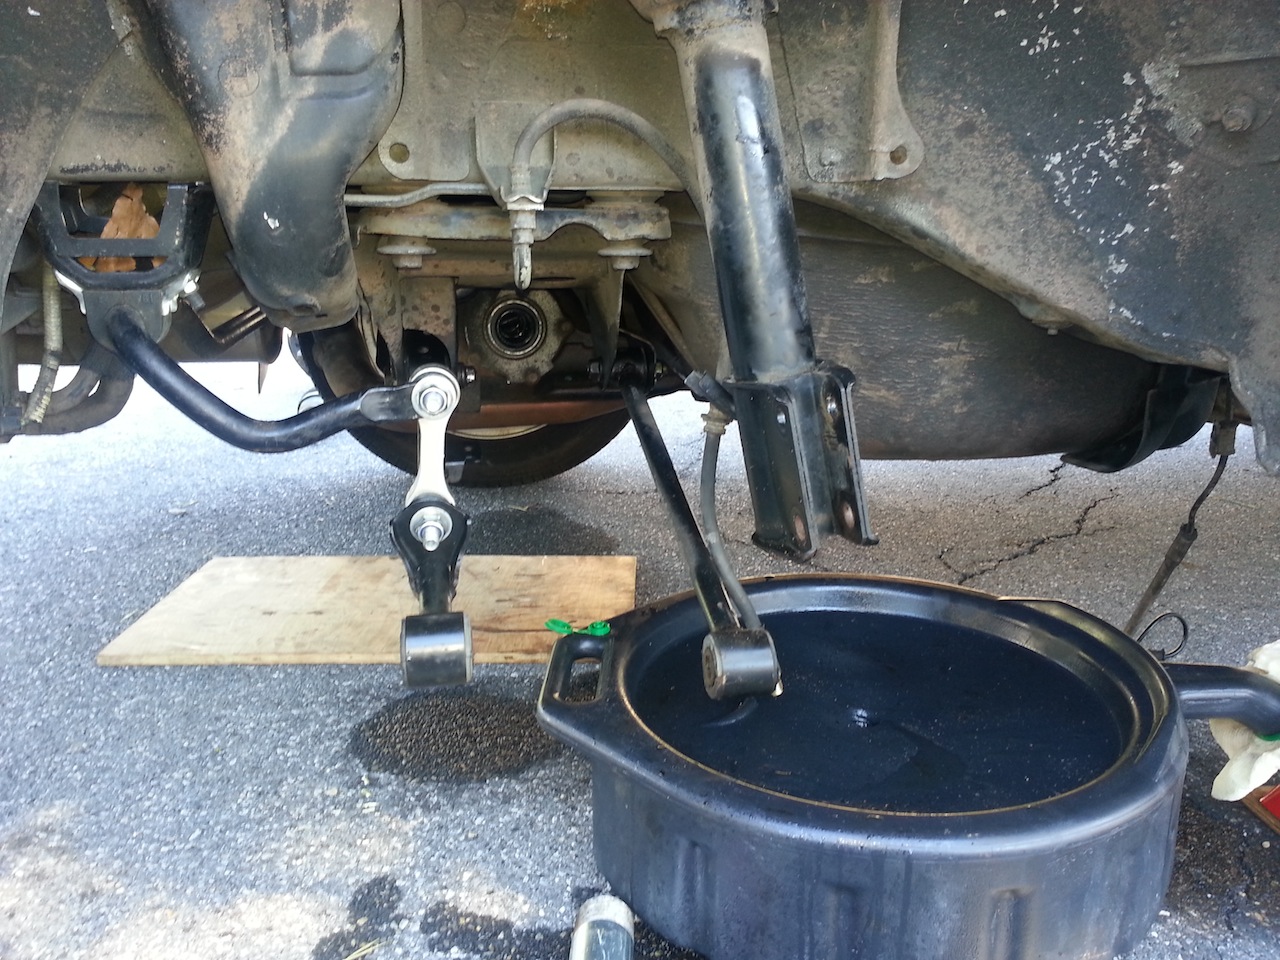
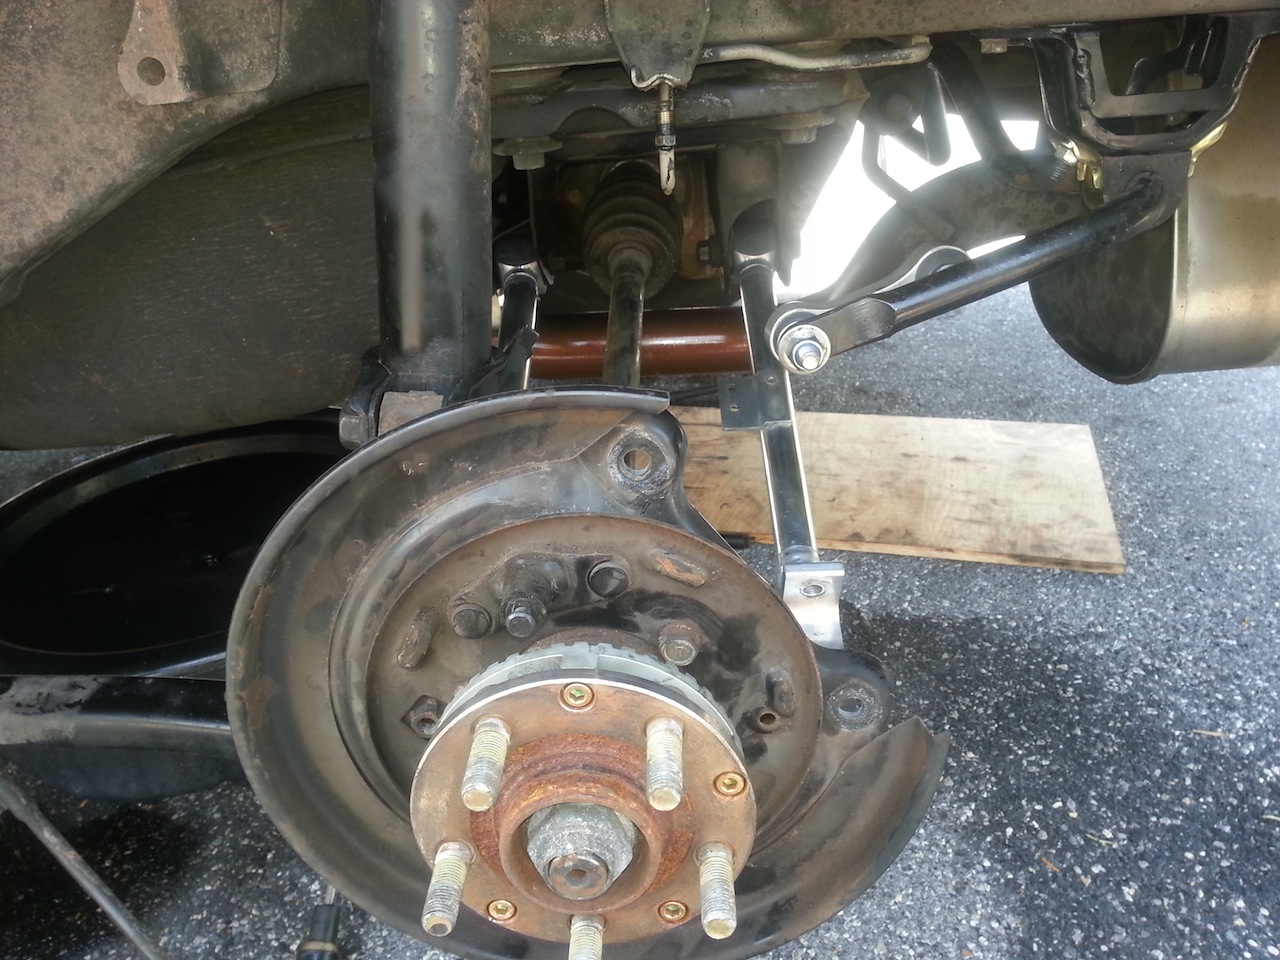
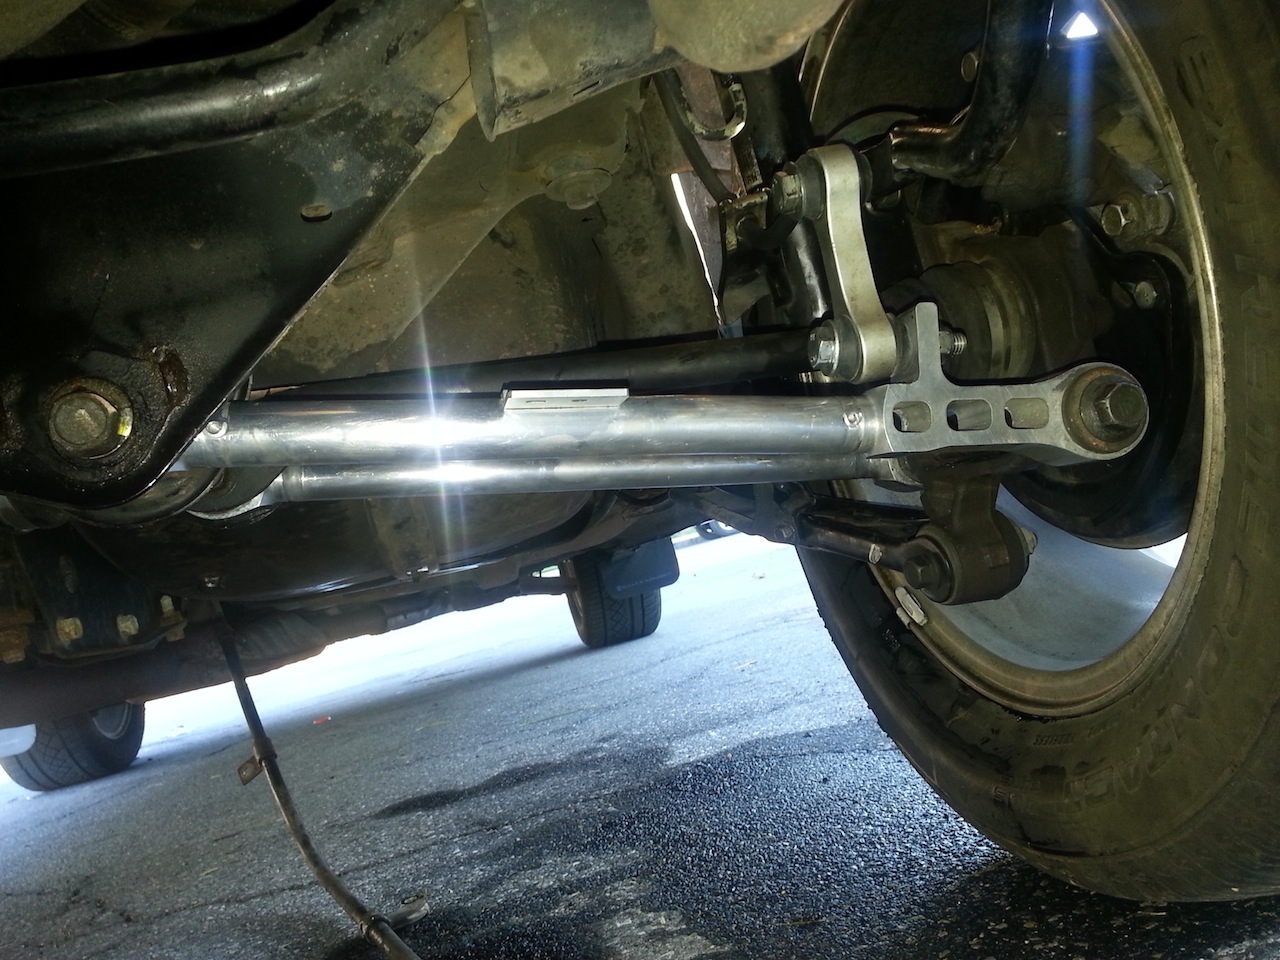
Here’s a shot of my (near) stock suspension, since in changing from drum to disc I also changed out my end links and lateral links
On to the swap!
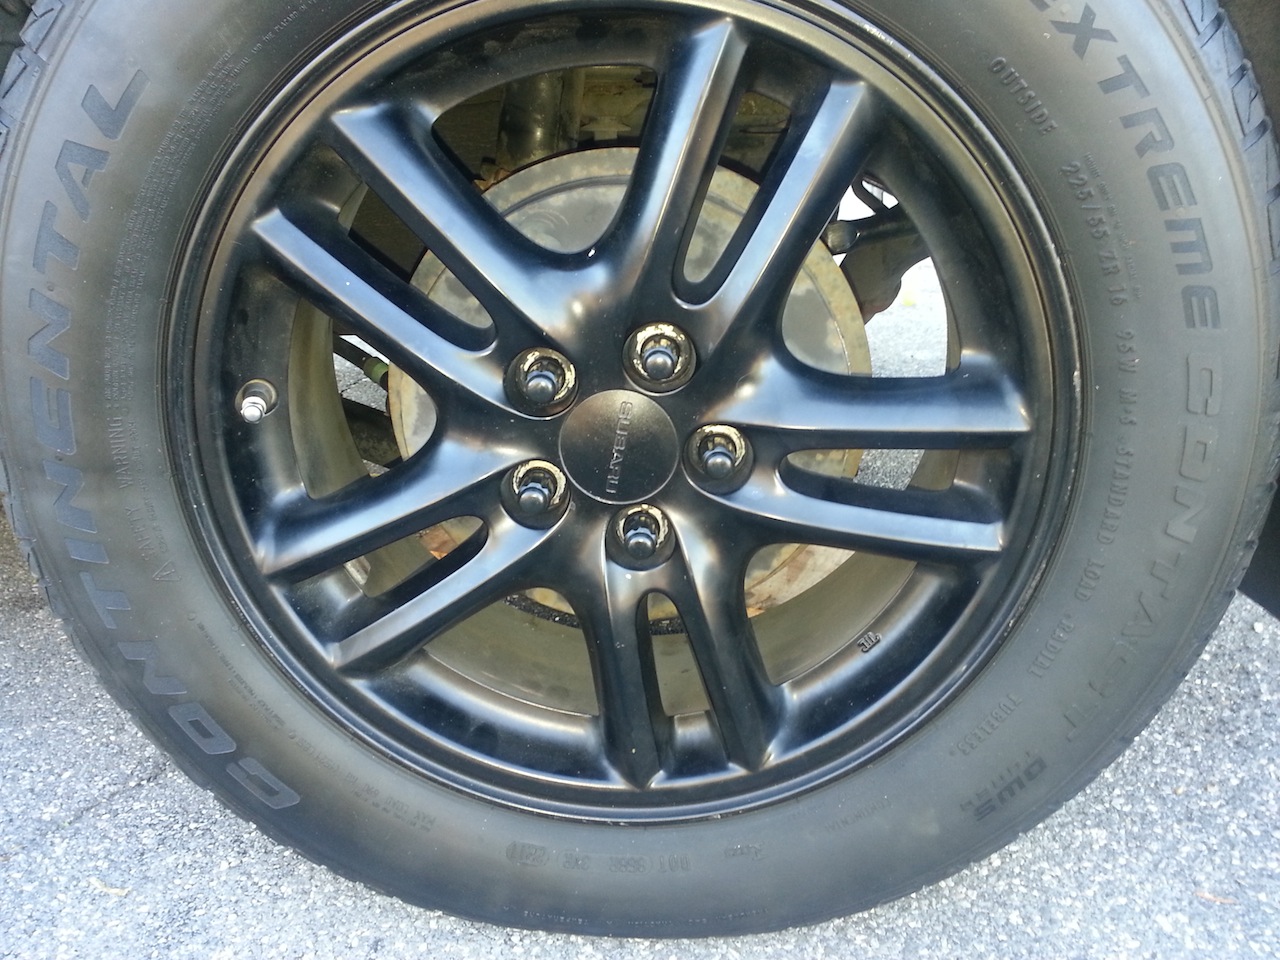
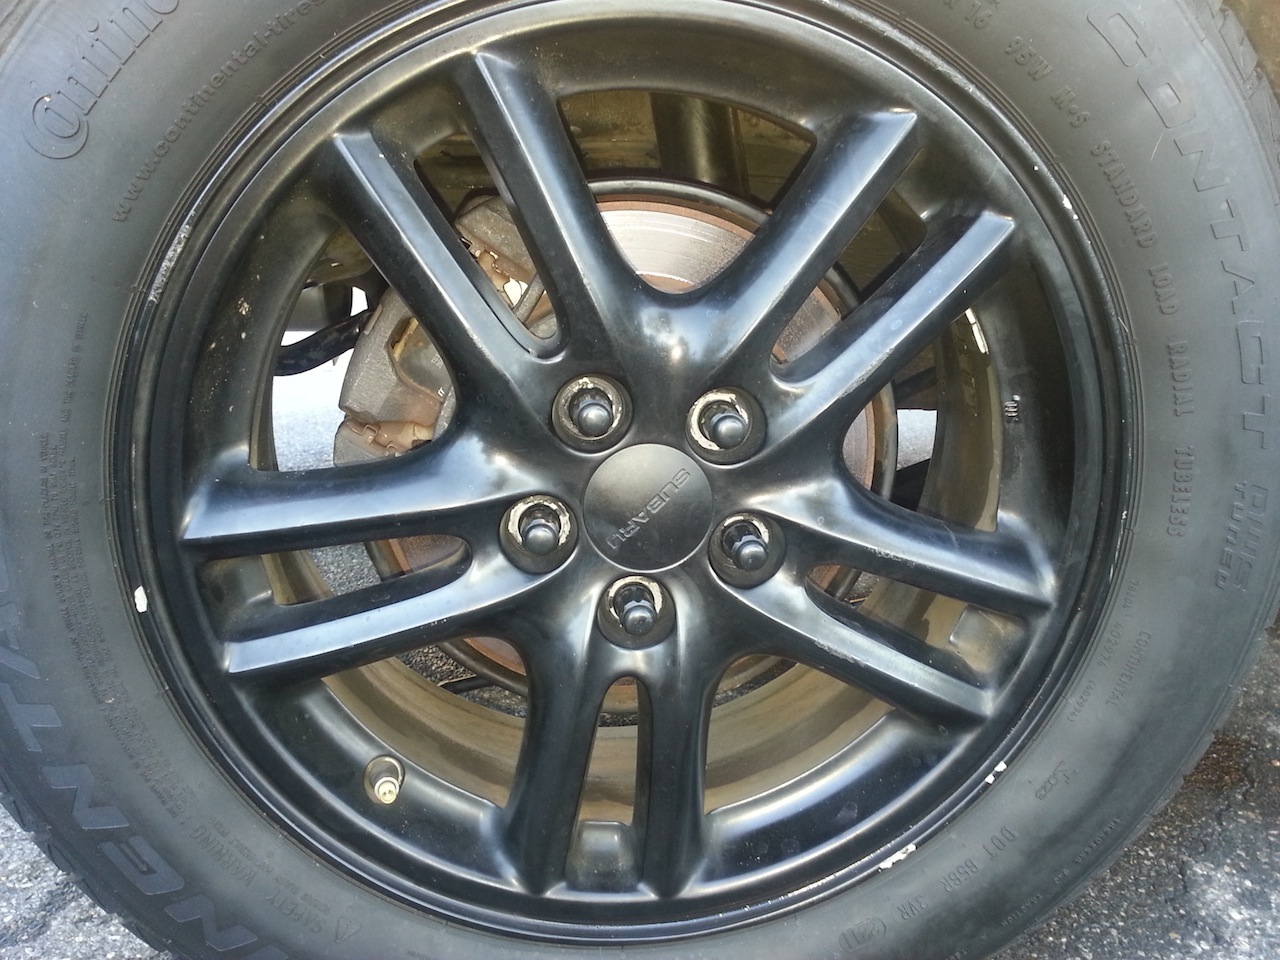
General Note: I’m having fitment issues on my tires post-swap. Specifically, I’m running ’05 WRX wheels (16×6.5 w/ 55 offset) and I’m now getting rubbing on my strut from my Continental’s (225/55/16). It appears, from a rough measurement, that from the back of the dust plate to the base of the studs is about 5-6mm different between drum and disc. This was enough to cause some rubbing, but can be cured by either a) thinner tires, b) shallower offset, c) wheel spacer, or d) any combination of the above.
- Disconnect and remove e-brake cable from interior
- Disconnect connecting lines at drum hub (brake, ABS, e-brake)
- Remove drum hub assembly
- Install disc hub assembly
- Run e-brake lines
- Reinstall connecting lines at disc hub (brake, ABS, e-brake)
- Disc e-brake cables
- Disc calipers
- Disc Rotors
- Disc hubs+knuckles
- Brake fluid
- Brake Bleeder kit
- *Axles
- *Trailing arms
- **E-brake hardware kit (springs, etc for e-brakes)
* Optional, makes things easier, especially the axles
** Optional, but highly recommended
- Jack
- Jack Stands
- Brake Fluid
- Brake bleeder kit
- Copious amounts of PB Blaster
- Liquid catcher for brake fluid
- Philips screw driver
- Flat-head screw driver
- 8mm deep socket or wrench
- 10mm socket or wrench
- 12mm socket or wrench
- 14mm socket or wrench
- 2x17mm socket or wrench
- 2x19mm socket or wrench
- 15/16″ Wrench (or near equivalent)
- 1/2″ &/or 3/8″ breaker bars depending on your socket sets
- Diverse swear word vocabulary
- Gloves
- Safety Goggles
Tools Needed:
- Philips screw driver
- Flat-head screw driver
- 8mm deep socket or wrench
- 12mm socket or wrench
- 14mm socket or wrench
- Open the tall portion of the center console, there are 3 screws at the bottom, remove them
- There are two screws at the front of the tall part of the console that connects it to the cup-holder portion, remove them
- Pry up the plastic facia in front of the shifter (portion with the 12V plug and ashtray), turn the key and place the car in neutral with your foot on the brake, then set the facia you just pulled off to the side. I didn’t bother disconnecting the cable for the 12V plug. Put the car back in park and then turn off the key
- Unbutton the e-brake boot and remove the screws in the plastic that were covered by the plastic facia
- Pry the forward side panels off the cup holder section and remove the cupholder section by lifting straight up, set aside
- Disconnect the 12V plug line running to the tall portion of the center console
- Remove the bolts holding the tall portion of the center console, 2 in the front (under the head unit) and 1 towards the middle, around where the shifter is, remove the tall portion of the center console and set aside
- Remove the back seat by removing the 2 bolts in the footwell of the rear of the car
- Unhook the carpet by peeling up the plastic tab in the middle of the back seat (helps to use a flat-head screw driver to get the plastic tab up)
- Pop the grey plastic retainer button seen on the back seat deck near the door and pull up the plastic cover (mount points: door metal edge, 2x’foot’ of door frame) – Do this on each side
- Begin peeling back carpet to reveal the center footwell area up to where the center console was, exposing the entry points for the e-brake cables and the retaining clips bolted into the floor that hold the cables
- Loosen the 2 nuts on the e-brake tensioner, push the cable down to produce slack in the e-brake cables.
- Follow that cable to the 2-to-1 clip that connects the two e-brake cables to the tensioner cable. Turn the clip to one side and free a cable, do the same for the other cable.
- Unbolt the brackets hold the e-brake cables in place, push the e-brake cables through the floor.
- Take the new e-brake cables and push them through the floor. Attach the new cables to the tensioner bracket and re-install the brackets holding the cables in place. Don’t worry about tightening the tensioner cable at this point.
*** = Only necessary if replacing the lateral links, as I did
**** = Only necessary if the donor disc wheels have trailing arms or axles
- Flat-head screw driver
- 12mm socket or wrench
- 2x17mm socket or wrench
- 2x19mm socket or wrench
- 15/16″ Wrench (or near equivalent)
- 1/2″ &/or 3/8″ breaker bars depending on your socket sets
- Jack up your car and set it on jack stands. I did one side at a time, especially after what happened earlier.
- Remove the tire
- Take a 10mm wrench and loosen the brake line Then take a flat head screw driver and pull out the tab holding the brake line in place. Once that is done, take your new caliper and zip-tie it to the spring. Connect the caliper to the hard line to help prevent air and moisture from entering the system. This will make bleeding easier later:
- Use the same screw driver to pop the tab on the strut holding the brake line:
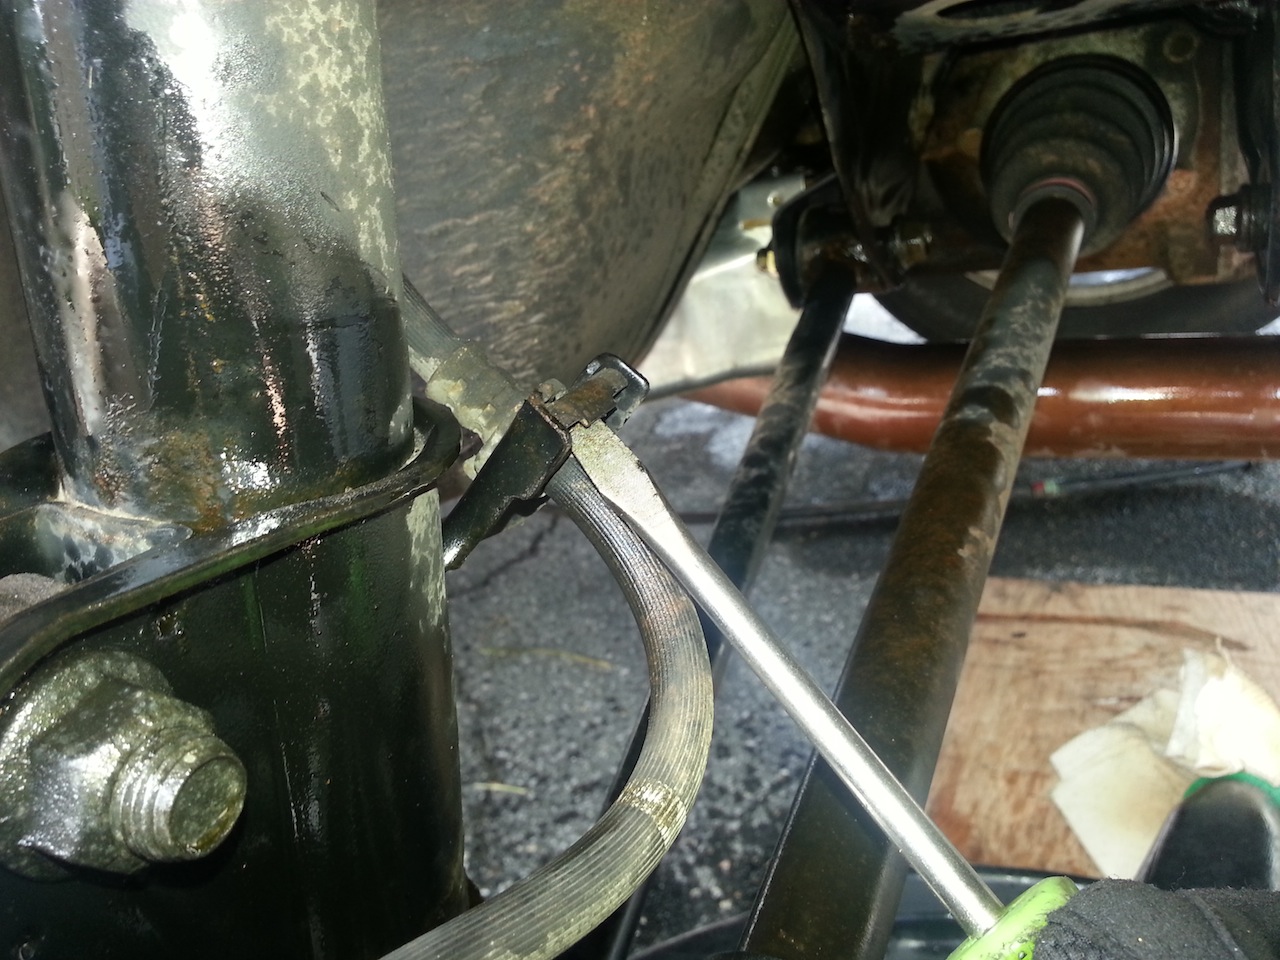
- ***Remove the end link, at the very least the lower portion connected to the lateral link, mine were 17mm bolts and nuts
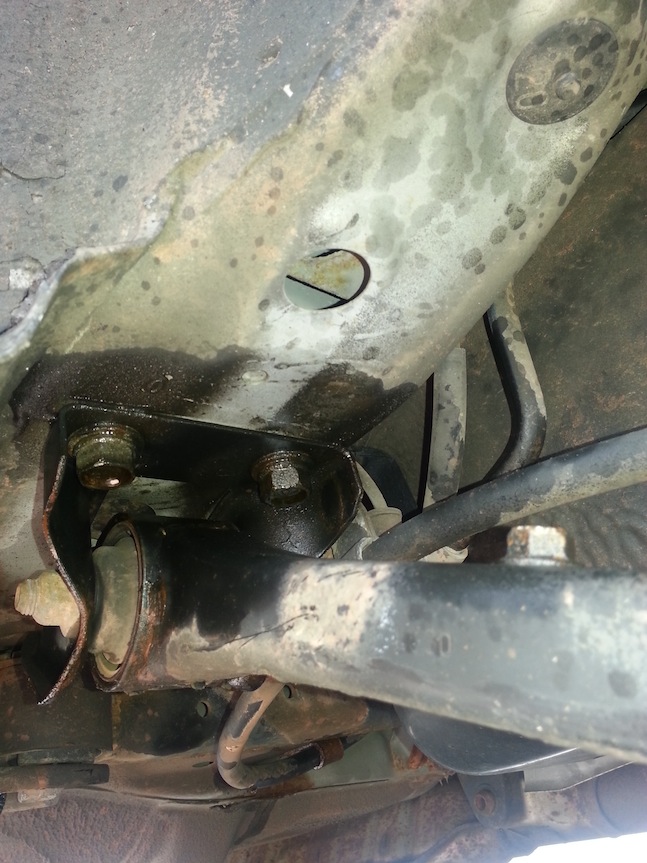
- Remove the bolt connecting the lateral links to the knuckle. This was a particularly tight bolt, requires 2x19mm. I used a 1/2″ drive breaker bar and a 19mm wrench, and it was still hard. I actually put the bolt back in at least part way just to keep things stable as I removed the rest of the pieces.
- Remove the bolts connecting the knuckle to the strut housing. Again, these are 19mm bolts and are a pain to get out if you haven’t removed changed out your suspension recently. I left the top bolt in again for stability.
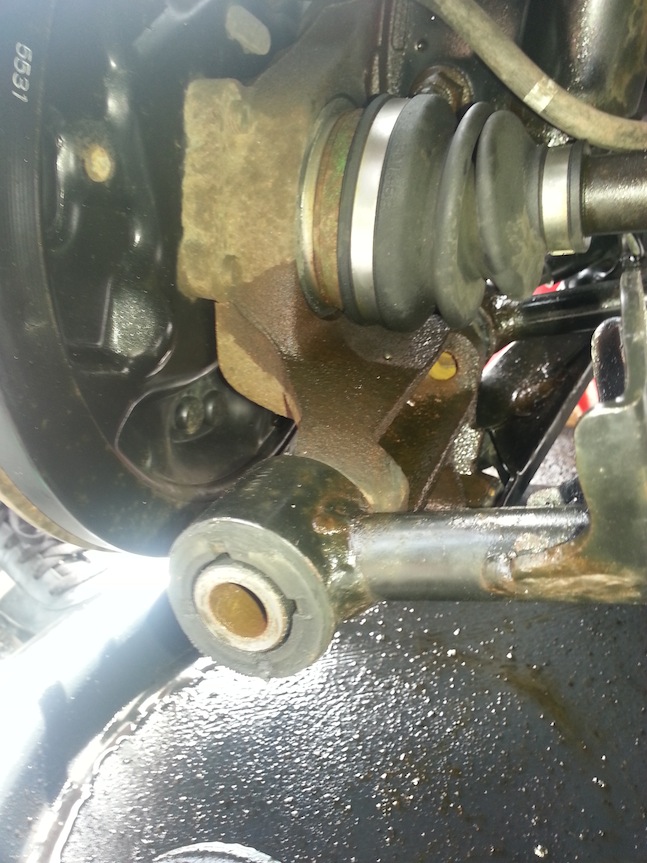
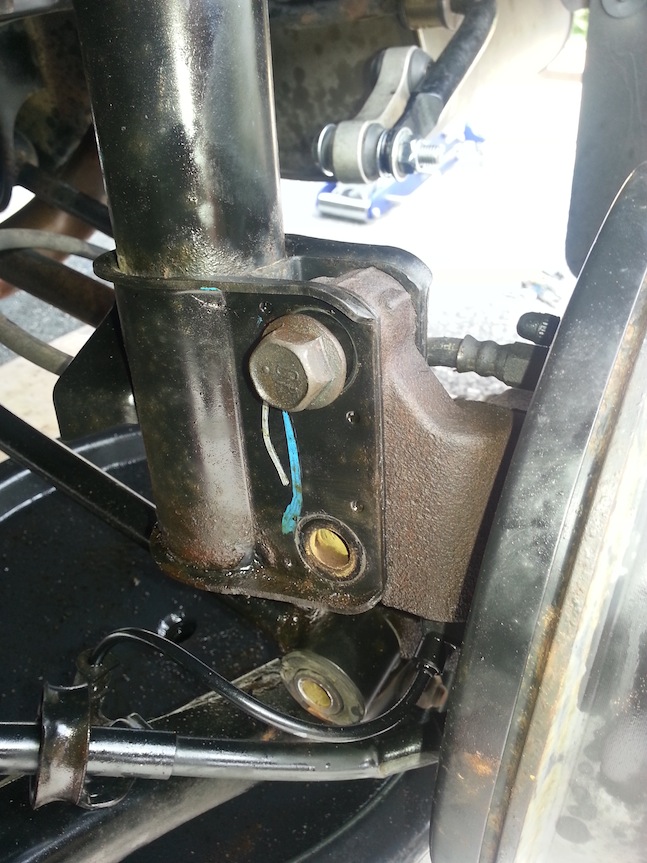
- ****Next I removed the bolts holding the ABS and e-brake lines from the trailing arm (12mm). Following that, I removed the ABS sensor from the drum brake assembly (12mm). Additionally, at this point you will want to crack open your drum brake and disconnect the e-brake line from the housing (not pictured):
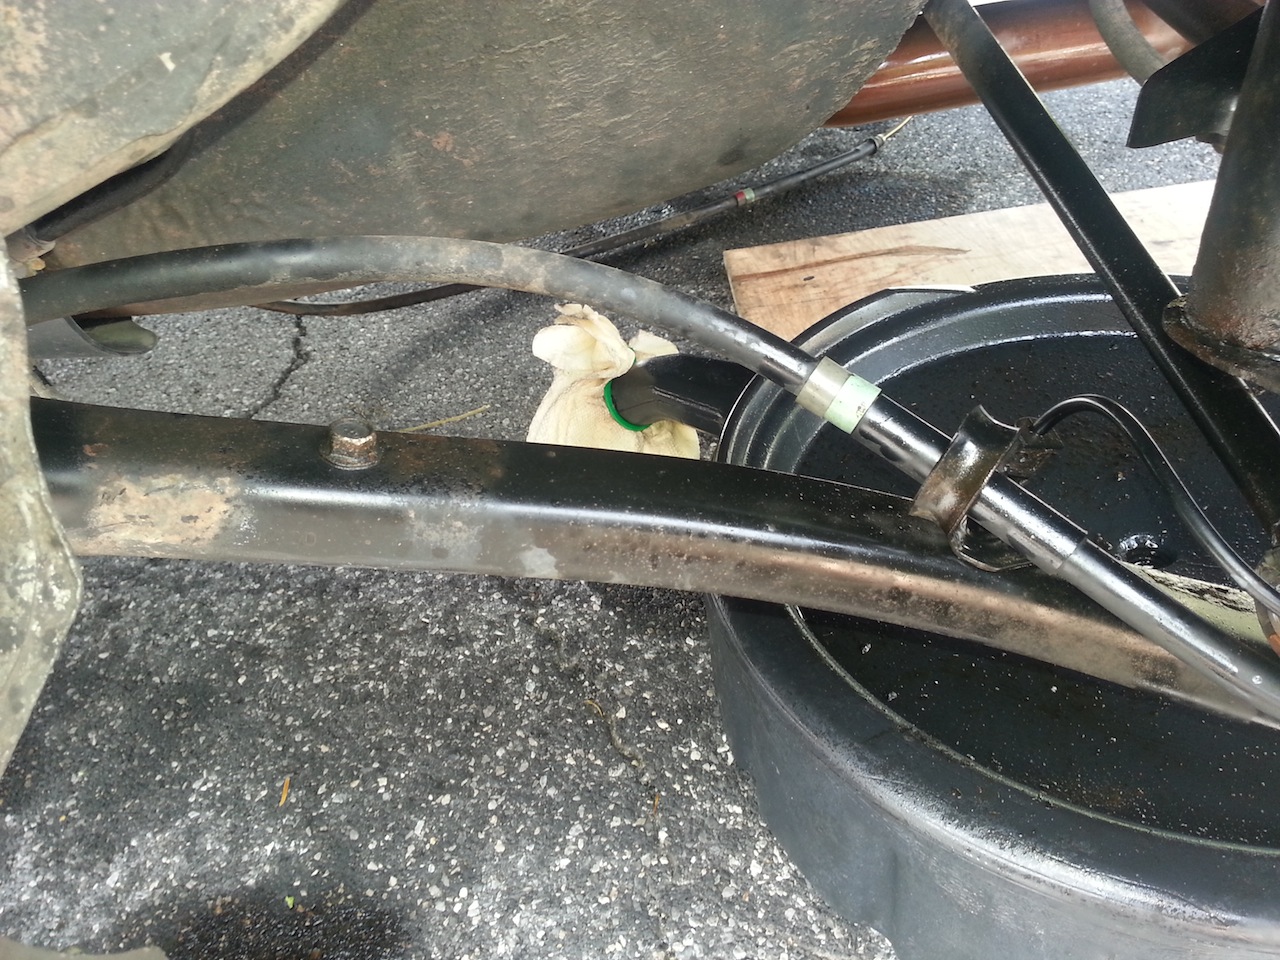
- ****Next, I removed the bolts holding the trailing arm to the frame:
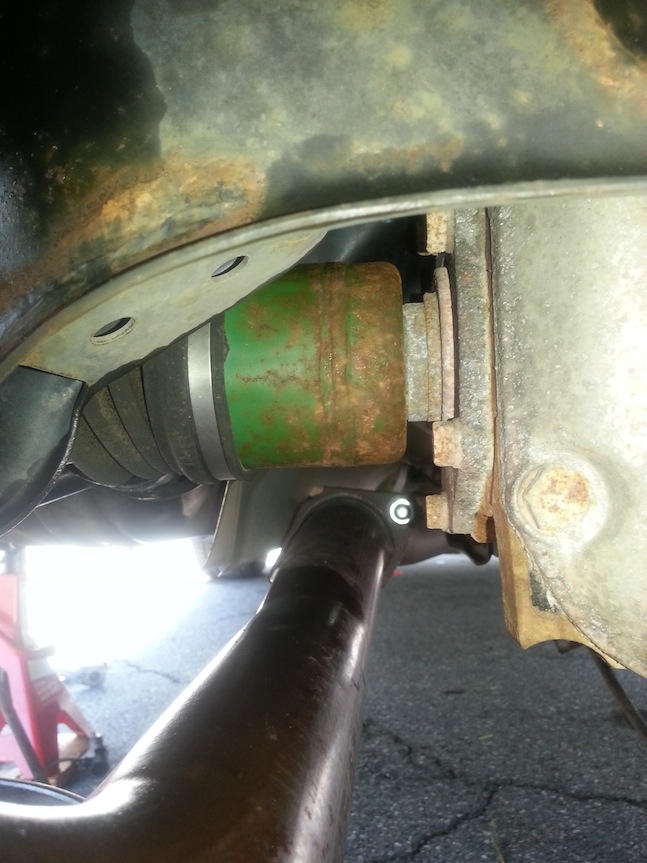
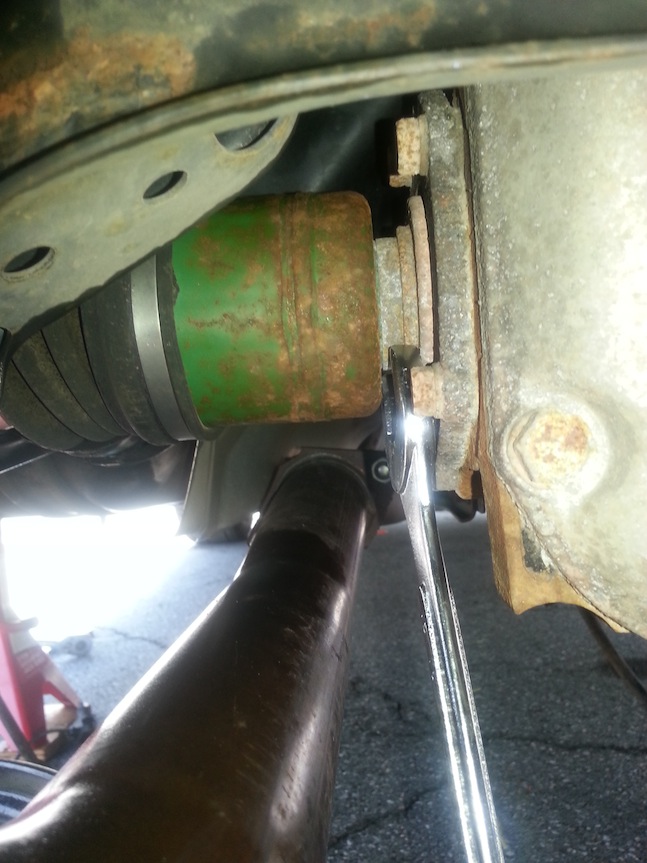
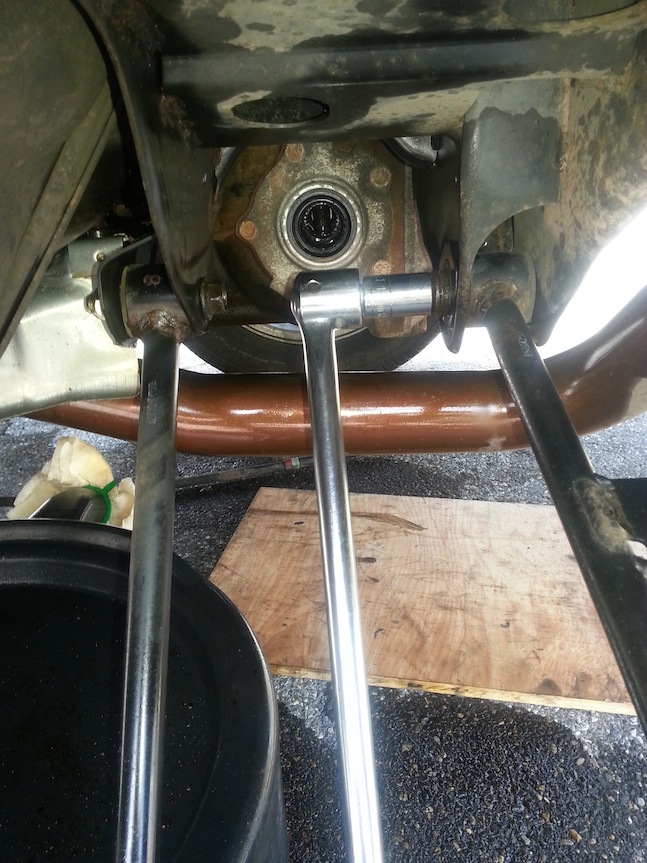
- ****To remove the axle from the rear diff, insert a wrench (I used a 15/16″, but it just needs to be narrow enough to fit in between the diff and the green part of the axle) into the space, brace it against the diff, and then smack it a few times. The axle should pop right out after a few tries.
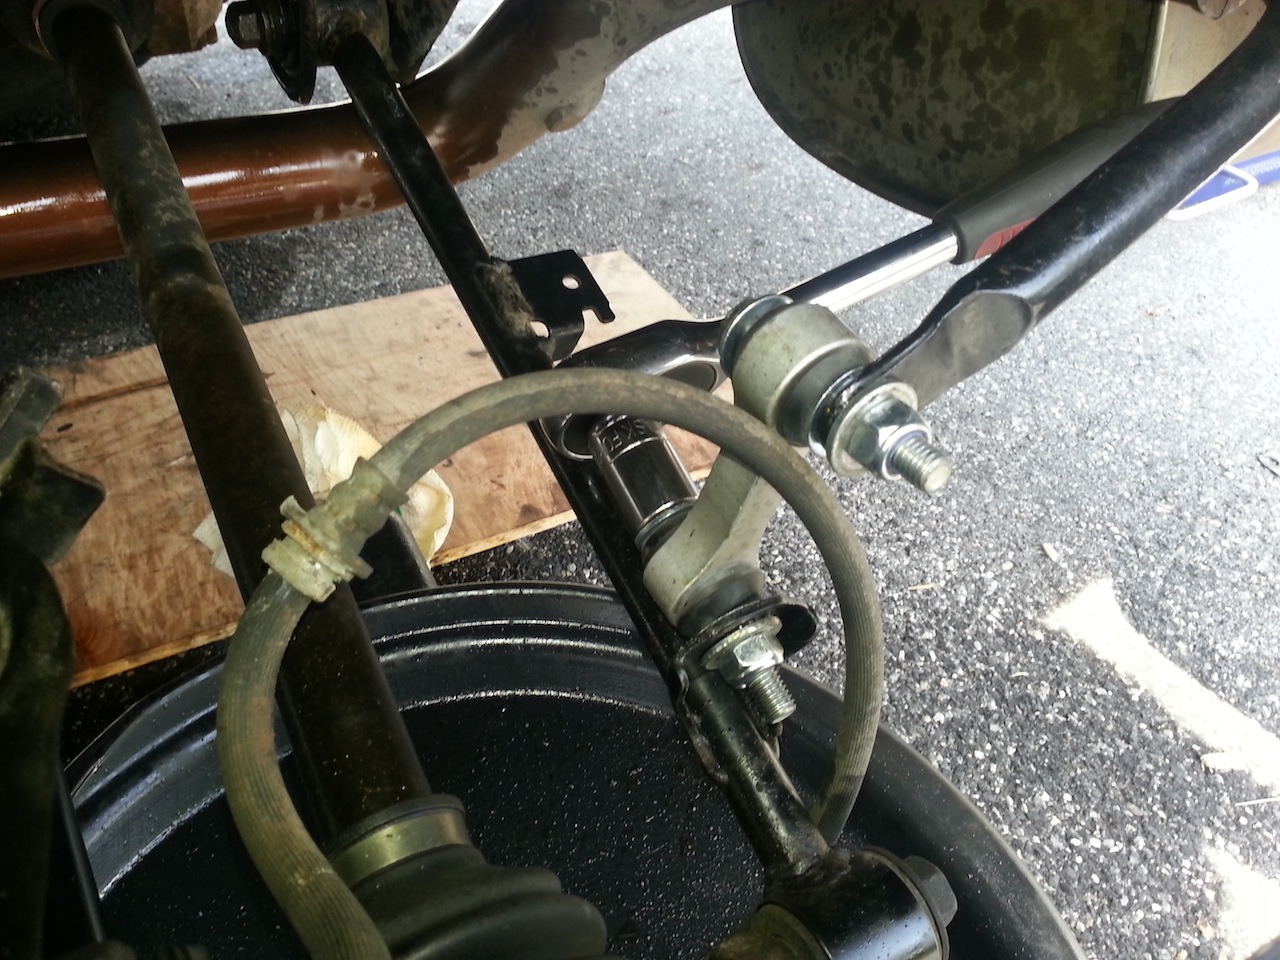
- Remove the strut bolt and lateral link bolt holding the knuckle assembly in place and remove whatever part of the assembly you have the parts to replace:
- ****Use a 17mm socket and a breaker bar to remove the nuts and bolts connecting the lateral links to the frame. You’ll need a 17mm wrench for the front-most nut on the front arm. A 17mm socket and a breaker bar work miracles for the two inside nuts/bolts.
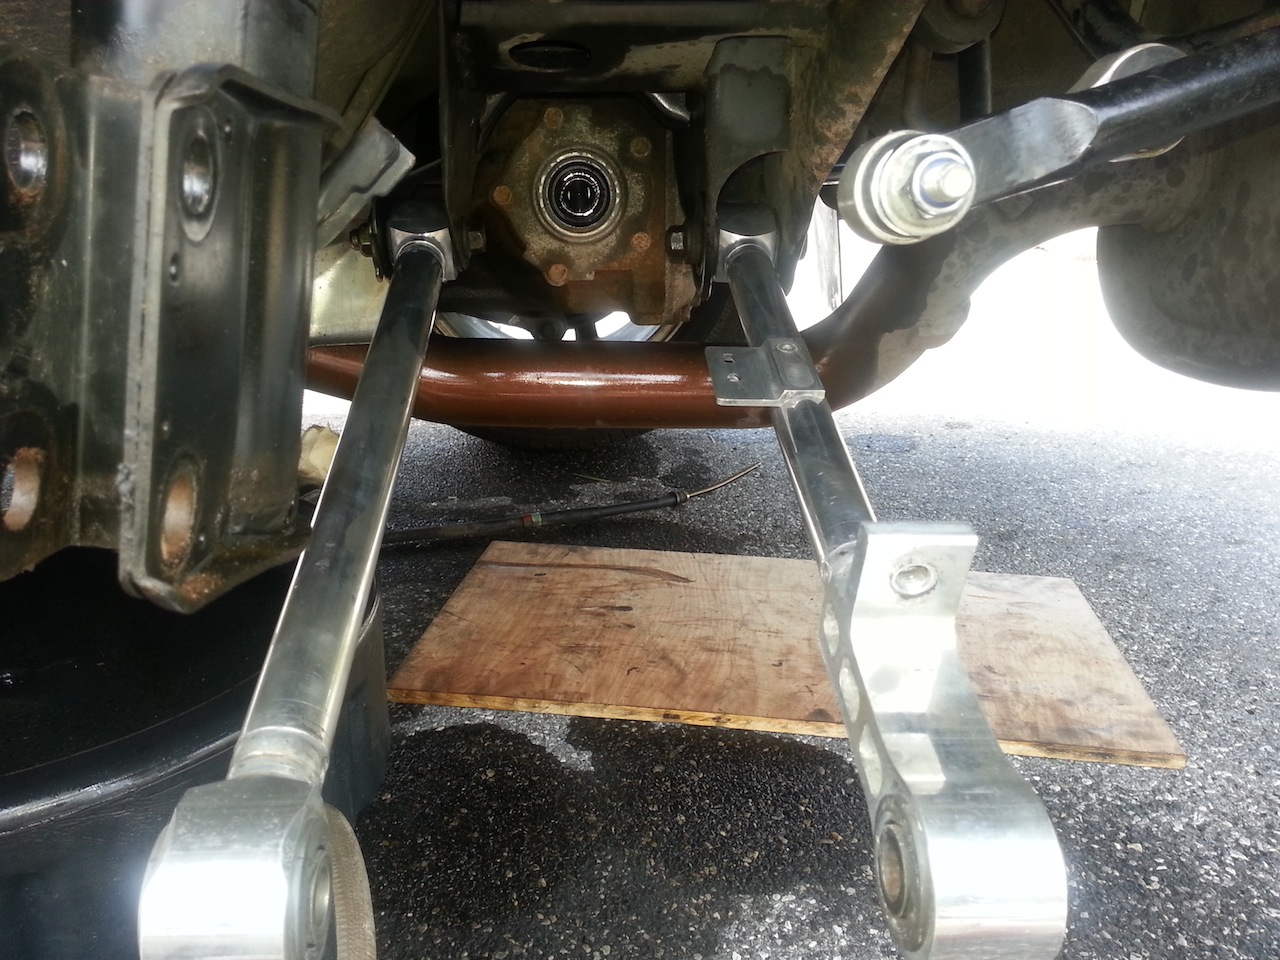
- ***Attach the new lateral links. I hand-tightened these so that they would stay up but could still be moved when I needed to align them after I inserted the new axle/knuckle/hub/trailing arm assembly.
- Put the new assembly in place, sliding at least a strut bolt to make sure you don’t have to hold it up:
- ****If the axle doesn’t get inserted properly, you will likely have to rotate it a little bit until it can slot into place. It should look like it did after you ‘popped’ it out during disassembly:
- ****To insert the axle, from the wheel well, put your thumbs on the base of the hard green part and simply push in, you’ll feel a satisfying pop
- Begin the process of removing the old e-brake cables and attaching the new ones. I found it easiest to remove a screw and then immediately mount the new one in its place.
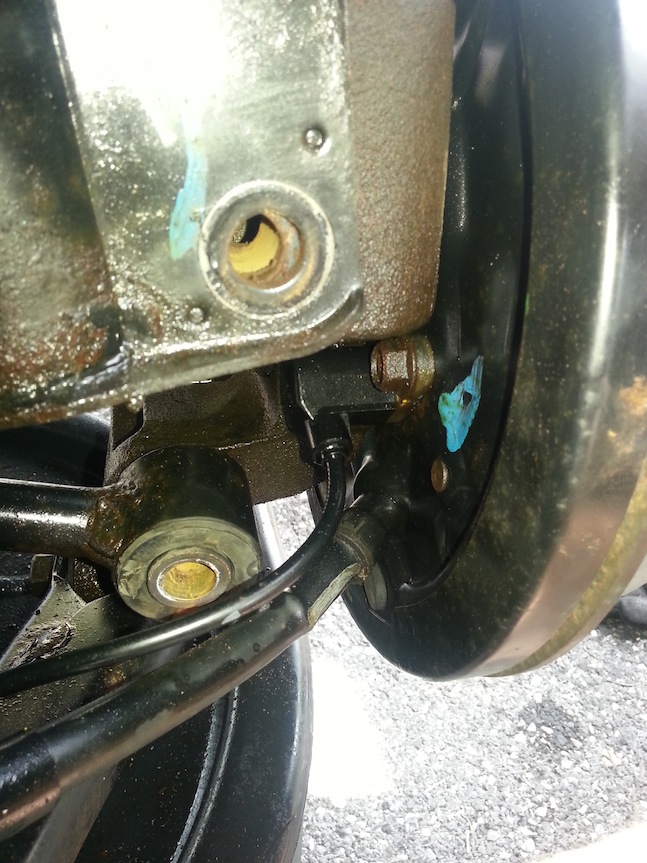
- Attach the new e-brake and ABS cables to the top of the trailing arm
- ***Reattach the new trailing arm to the frame
- Adjust the lateral links and insert the long bolt through the links and the knuckle
- Reinsert and tighten the strut bolts and nuts
- ***Tighten the lateral links using 2x17mm wrenches and all your might
- Reattach your ABS using the 12mm bolt to the rear of the brake and trailing arm (if removed)
- Put your disc rotor on over the e-brake assembly
- Put the caliper on, attaching the brake line to the hardline and re-inserting the retainer tabs.
- Put the wheel and tire back on, marvel at your accomplishment
Alternative Note: If you do not have an axle to swap in, now would be a good time to have a friend stand on the brakes and, using a 32mm socket, knock loose the hub nut holding the hub to the axle
Alternative Note: If you are removing the trailing arm, there is also one last bolt in addition to the 2 below that secures the ABS and e-brake lines to the trailing arm, close to where the trailing arm attaches to the frame. I found it easier to remove this bolt after the trailing arm is off. If you are not removing the trailing arm, then you will need a 12mm wrench to remove the bolt as there is no clearance for a socket.
Alternative Note: If you do not have a new trailing arm to swap in, remove the trailing arm from the knuckle using what I presume is a 19mm socket combo (not verified)
Alternative Note: If you are not removing the axle from the diff, now is the time to go ahead and finish removing the axle from the hub. There are numerous guides on how to do this if you are unsure
Alternative Note: If you are not replacing the lateral links, ignore this step.
Alternative Note: If you are replacing the lateral links, but are not swapping the axles, simply use 2 17mm wrenches and a cheater bar + some hefty swearing
Alternative Note: Reattach the trailing arm to the new knuckle
Note: My e-brake came completely disassembled, so I had to reconstruct the e-brake at this point. I used this and this to reassemble my parking/e-brake
Now repeat for the opposite side.
- Back in the interior (which is still ripped apart), begin tightening the e-brake tensioner. There is some discussion as to how many clicks is appropriate, but really I feel it is whatever you are comfortable with.
- Once at the appropriate tightness, reassemble the interior by reversing the steps from above. Make sure you clean out the e-brake boot while you’re at it, no one likes 6-year old french fry crumbs